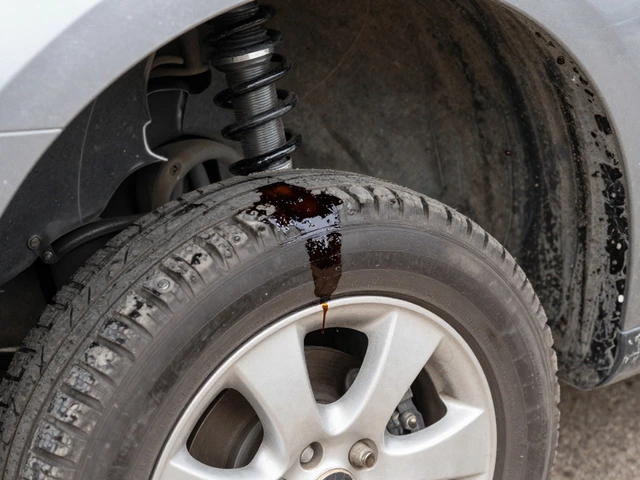
So you're wondering if you can check your brake pads without pulling off the entire tire? Yep, it's possible, and it might not be as tricky as it sounds. You see, in many cars, the wheel design offers just enough spacing and slots to peek through and get a decent look at the brake pads.
Now, before you dive head-first into this DIY inspection, make sure your car is parked on a flat and stable surface. Safety always comes first, right? You’ll need a flashlight, good lighting, and maybe a pocket mirror. Having a clean rag might be helpful too if things are dusty down there.
Once you're ready, take a flashlight and shine it through the wheel. Look for the brake pad against the rotor. If there’s more than a quarter of an inch left, you're likely good for a while; if not, it might be time to think about a replacement soon.
This little trick, though not foolproof, can help you stay ahead of brake issues. Of course, if you spot anything that looks amiss or if you're just not sure, it might be time to get professional eyes on it. No harm in getting a second opinion, especially when it's about your safety.
- Understanding Brake Pad Visibility
- Identifying Telltale Signs of Wear
- Using Tools for Better Inspection
- When to Seek Professional Help
- DIY Tips for Regular Checks
Understanding Brake Pad Visibility
Peering through the wheel to check your brake pads isn't magic—it's all about understanding what you're looking at. Not every set of wheels will give an easy view, but with a little patience, you can often get a decent idea about the health of your brake pads without needing to remove the tire.
First things first, you need to know what you're looking for. The brake pad is that hunk of material pressed against the rotor when you hit the brakes. Over time, with every stop, this material wears down. If it's less than a quarter of an inch thick, it might be time for a new set.
How to See It Clearly?
Start by parking your car on even ground and ensuring it's securely in place—nobody wants an accident. Using a flashlight, shine through the wheel and find the rotor. Right next to it, often nestled in a caliper, will be your brake pad. Some folks like to use a small mirror for better angles.
Here's a quick step-by-step:
- Turn the car's steering wheel for better angles; this can help align the wheel slots with the brake.
- Take a flashlight and peer through the wheel's spokes or holes.
- Look for the edge of the brake pad next to the rotor, checking its thickness.
Remember, this isn't as precise as taking everything apart, but for routine spot-checks, it can help keep your vehicle safely on the road.
When Visibility Is Limited
Some wheel designs just won't cooperate. In these cases, you might only get a partial view. Always err on the side of caution. If you're uncertain, or your wheels hide everything thoroughly, it's always best to get a professional involved.
Taking the time to understand how to spot telltale signs of wear without stripping down too much of your vehicle is a handy skill. It not only saves time but helps you stay on top of car maintenance and vehicle safety—keeping those road trips smooth and safe.
Identifying Telltale Signs of Wear
Knowing when your brake pads are on their last legs can save you from a world of trouble. So, how do you spot those warning signs? Let's break it down.
Listen for Unusual Noises
First up, pay attention to the sounds your brakes are making. If you hear a high-pitched squeal or grinding noise, it might be more than just annoying—it's often a sign that your brake pads need attention. These sounds come from wear indicators on some brake pads designed to alert you when they're getting thin.
Feel the Braking Response
If your brake pedal feels squishy or you notice the car taking longer to stop, that's another clue. A soft pedal might indicate your brake pads are too worn to generate the necessary friction. This decrease in performance can pose a safety risk, especially in emergencies.
Inspect for Physical Wear
Go ahead and get a good look at your brake pads through the wheel. If they appear to be less than a quarter-inch thick, they’re likely nearing the end of their lifespan. Some brake pads even have a slot or indicator mark; if it's almost gone, replacement time is near.
| Common Signs | What They Indicate |
|---|---|
| Squealing noise | Wear indicator reaching the rotor |
| Longer stopping distance | Reduced friction due to pad wear |
| Visible pad thickness below 0.25 inches | Time for a replacement |
Remember, regularly checking these signs can help you catch brake pad issues before they become a serious problem. This could save you money, but more importantly, help keep you safe on the road.

Using Tools for Better Inspection
Alright, checking those brake pads with just your eyes through the wheel openings might not always cut it, especially if there's grime or poor lighting. But, don't worry—there are a few simple tools that can make your life a whole lot easier and your inspection more accurate.
Flashlight and Mirror Combo
Start with a good, bright flashlight. Shine it through the wheel to get a clear view of the pad. Sometimes the angle can be tricky, especially if your wheels are designed with fewer openings. That's where a small, hand-held mirror comes in handy. Just angle it so you can see the inner side of the pad reflecting in the mirror. This setup is great for spotting any uneven wear or signs of damage.
Brake Thickness Gauge
If you're serious about getting precise measurements, consider investing in a brake thickness gauge. This tool slides in between the pad and the rotor, giving you an exact reading of the remaining pad thickness. It's a small gadget, usually sold in auto parts stores for a reasonable price. Plus, it's super straightforward to use, and knowing the exact thickness is always reassuring.
Inspection Camera
Here's a high-tech option if you want to get really up close and personal with your brake pads—an inspection camera. These are tiny cameras, often on a flexible arm, that can get right up to hard-to-see spots and give you a live feed. They're a bit of an investment, but if you frequently check your vehicle or other systems, they can be worth it.
With these tools, keeping tabs on your brake pads without tire removal becomes more feasible. Remember, once you've done the inspection, always clean your tools and store them properly—good gear deserves good care!
When to Seek Professional Help
No matter how handy you are with car maintenance, there comes a time when calling in a pro is the smart move. So, how do you know when it's time to seek professional help with your brake pads? Let’s break it down.
Unfamiliar Sounds
If your car starts making weird noises—like grinding or squeaking—when you hit the brakes, it’s probably past DIY territory. These sounds often signal that the brake pads are worn out and could even indicate rotor damage if left unchecked too long.
Vibrations or Pulsing
When you press the brake pedal, does it feel smooth or more like a bumpy ride? Vibrations or a pulsing brake pedal might mean that your brake pads are uneven or that there’s a rotor problem. Either way, you'll want a specialist to take a look.
Irregular Pad Wear
If you notice one pad is wearing down faster than the others, it could mean there's a bigger issue with your brake system. Uneven wear might need adjustments that only a trained mechanic can handle properly.
Dashboard Lights
Sometimes your car will do you a favor and tell you something's up. If the brake warning light pops up on your dashboard, don’t ignore it. This feature can alert you to both brake pad problems and other system issues.
| Warning Sign | Possible Issue |
|---|---|
| Noises like grinding | Worn-out brake pads |
| Vibrating pedal | Uneven pads, rotor issue |
| Dashboard warning | System alert |
There's no shame in seeking help when it comes to safety. Taking your car to a professional for any of these signs can ensure that small issues don’t turn into big, expensive ones. Plus, having peace of mind is something you can’t really put a price on.

DIY Tips for Regular Checks
Keeping those brake pads in check doesn’t always require a trip to the mechanic. With a little know-how and some basic tools, you can keep an eye on their condition right at home. Here's how you can make sure your car maintenance routine includes brake checks.
Spotting the Culprits
First things first, if your brakes sound like a pack of banshees, they’re probably screaming for attention. Listen out for those telltale squeaks or grinding noises. That’s often a sign your pads need a closer inspection.
Visual Inspection
Get comfy with checking the pads by observing them through the wheels. Use a flashlight for a good view. Remember, if the pad looks thinner than about 1/4 inch, it might be time for a change.
Feel the Braking Power
Ever notice your car pulling to one side when you brake? Or maybe it feels squishy when you press the pedal? These are red flags indicating uneven wear, possibly requiring a deeper look or adjustment.
Your DIY Routine
- Check every 12,000 miles or once a year—whichever comes first.
- Keep track of braking performance during your regular drives.
- Inspect visually every few months or when you rotate tires.
A little attention can go a long way in keeping your vehicle safety intact. Keep these DIY tips in your maintenance toolkit, and you’ll likely catch problems before they turn serious. Remember, a stitch in time saves nine!