Brake Pad Wear Calculator
Your Brake Pad Assessment
Estimated Brake Pad Life
UK MOT CompliantBased on your current setup, your brake pads should last approximately miles.
At this rate, you should replace them before miles.
Stop driving and replace immediately. Driving with pads below 1.5mm is illegal in the UK and risks brake failure.
Changing brake pads isn’t magic. It’s not something only mechanics can do. But it’s also not as simple as swapping out a light bulb. If you’ve ever heard someone say, "It’s just two bolts and you’re done," they’re either lying or haven’t driven a car with more than 50,000 miles on it. The truth? Changing brake pads is doable for most people with basic tools and patience - but only if you know what you’re getting into.
What You’re Really Doing When You Change Brake Pads
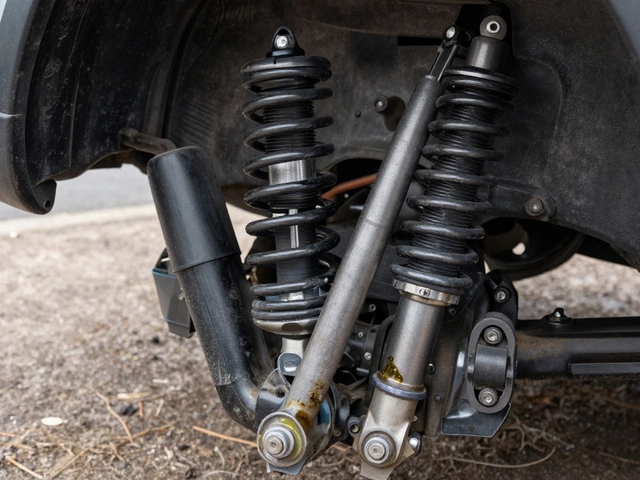
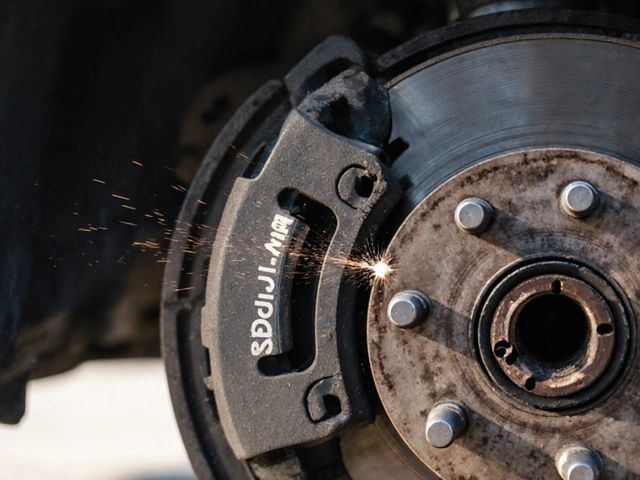
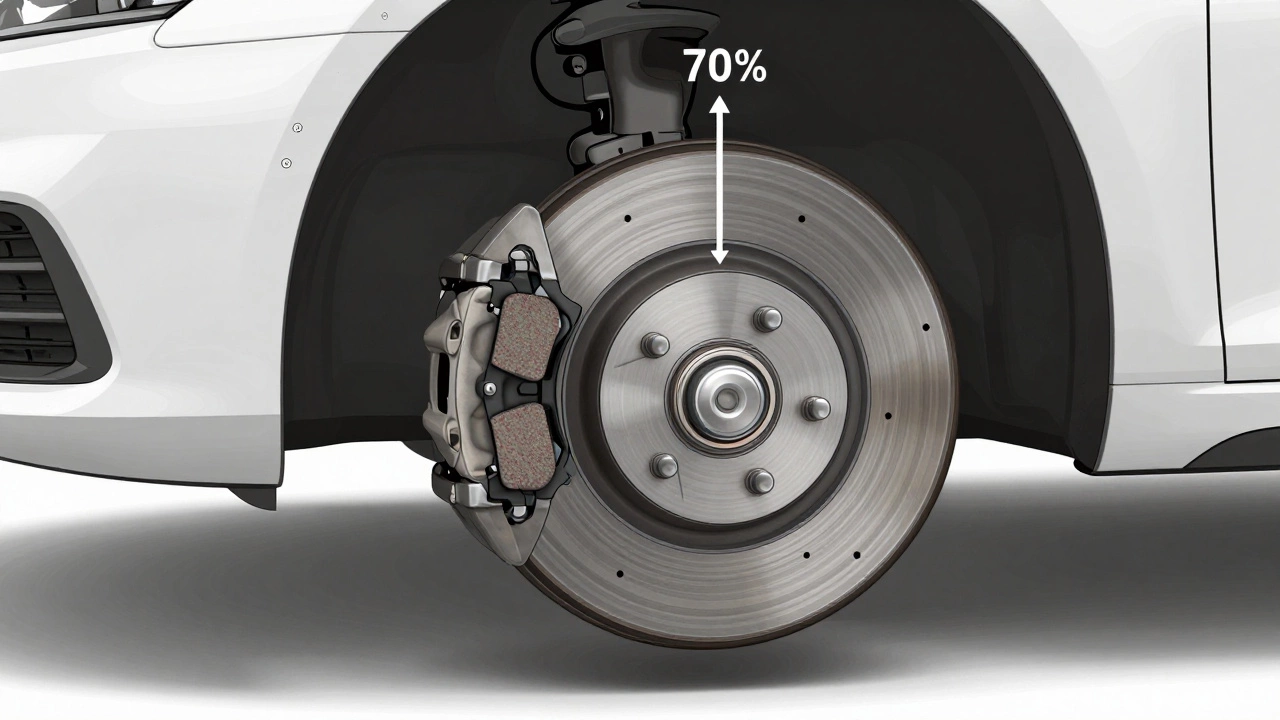
Brake pads are the rubbery, friction-heavy blocks that press against your rotors every time you tap the pedal. Over time, they wear down. When they get too thin, your brakes start to squeal, feel spongy, or take longer to stop. Replacing them isn’t just about fixing noise - it’s about safety. In the UK, worn brake pads are one of the top reasons cars fail their MOT.Most cars use disc brakes in the front, and many also have them in the rear. Front pads wear out faster - often twice as fast - because they handle 70% of the stopping power. So if you’re replacing pads, you’re probably focusing on the front first.
Tools You’ll Actually Need
Forget the flashy tool kits you see online. You don’t need a $300 set. Here’s what you really need:- Jack and jack stands (never rely on just a jack)
- Wheel brace (for your car’s lug nuts)
- 14mm or 17mm socket/wrench (depends on your car - check your manual)
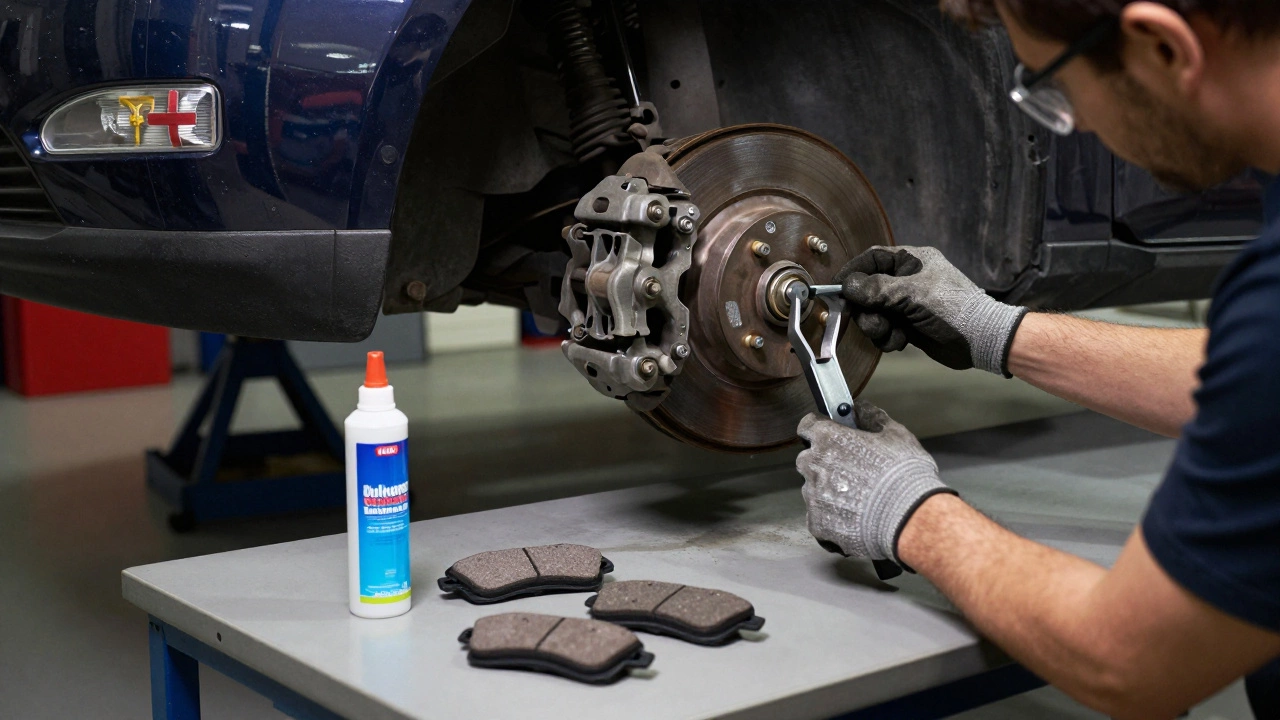
- C-clamp or brake piston tool (to push the caliper piston back)
- Brake cleaner spray
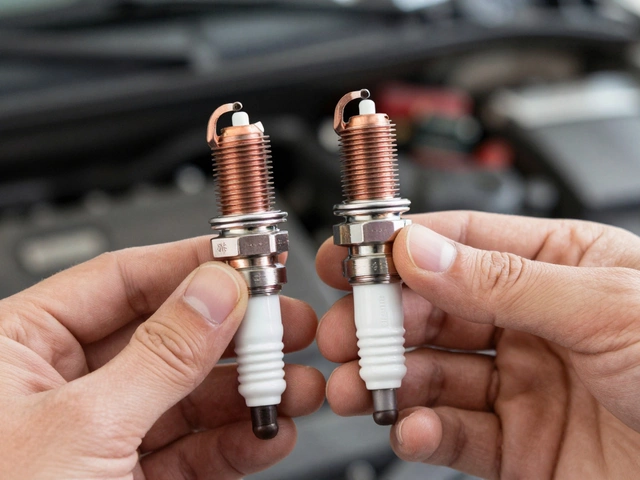
- New brake pads (make sure they match your make, model, and year)
- Gloves and safety glasses
That’s it. No torque wrench? You can manage without one - just tighten the bolts firmly by hand. But if you’ve got one, use it. Over-tightening can strip threads; under-tightening can make your caliper rattle loose.
The Step-by-Step (No Fluff)
- **Park on level ground.** Engage the handbrake. Put the car in park (automatic) or first gear (manual).
- **Loosen the lug nuts slightly** - don’t remove them yet. Do this while the car is still on the ground. It’s easier and safer.
- **Jack up the car** and secure it on jack stands. Double-check they’re locked in place. Never work under a car held only by a jack.
- **Remove the wheels.** Set them aside where they won’t roll.
- **Remove the caliper bolts.** These are usually two bolts on the back of the caliper. Some cars have slide pins instead - same idea. Take them out and hang the caliper from the suspension with a bungee cord or wire. Don’t let it dangle by the brake hose - you’ll snap it.
- **Take out the old pads.** They should slide right out. If they’re stuck, gently pry them with a flathead screwdriver. Don’t force it.
- **Clean the caliper and bracket.** Spray brake cleaner on the contact points. Wipe off any dust or rust. This stops new pads from squealing.
- **Push the caliper piston back.** This is the tricky part. Use a C-clamp or a dedicated brake piston tool. Place it on the piston and slowly turn the clamp to push it back into the caliper. You’re making room for the thicker new pads. If you hear grinding or feel resistance, stop. Something’s wrong - maybe the piston is seized.
- **Install the new pads.** Slide them in. Some come with shims - keep them. They reduce noise.
- **Reattach the caliper.** Bolt it back on. Tighten to hand-tight plus a quarter turn. No need to go crazy.
- **Put the wheel back on.** Hand-tighten the lug nuts.
- **Lower the car.** Then fully tighten the lug nuts in a star pattern. This ensures even pressure on the wheel.
What Can Go Wrong (And How to Avoid It)
Most people think the hardest part is removing bolts. It’s not. It’s what happens after.
- Squealing after replacement: You skipped cleaning the caliper or didn’t use anti-squeal paste. Apply a thin layer on the back of the pads where they touch the caliper bracket.
- Brake pedal feels soft: You didn’t pump the brakes after reassembly. Do this - press the pedal slowly 5-10 times before driving. It reseats the pads against the rotor.
- Caliper won’t close: You didn’t push the piston back far enough. Or worse - you didn’t open the bleeder valve. On some cars, especially older ones, you need to crack open the brake line slightly to let fluid escape as you push the piston back. Otherwise, you’ll damage the ABS system.
- Brakes pull to one side: One side isn’t clamping properly. Check if the caliper slides are stuck. Clean and lubricate them with high-temp brake grease.
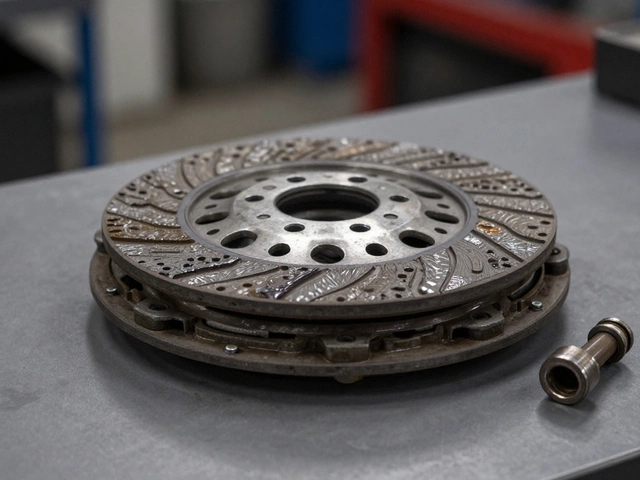
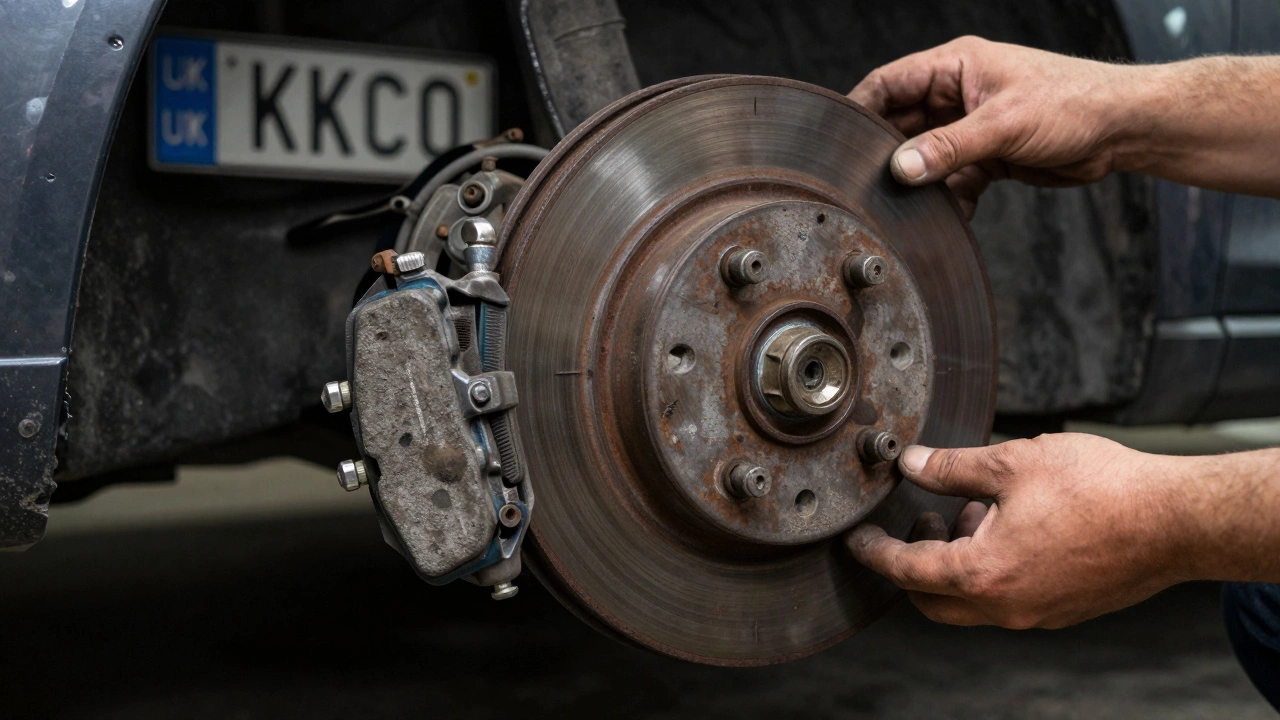
And don’t ignore the rotors. If they’re grooved, cracked, or thinner than the minimum thickness stamped on them (usually around 2mm), replacing pads alone won’t fix the problem. You’ll feel vibration through the pedal. At that point, you need new rotors - or at least a resurface. Most UK garages charge £40-£80 to resurface them. If your car’s over 10 years old, it’s often cheaper to just replace them.
How Much Do Brake Pads Cost in the UK?
Brake pad sets for common UK cars like the Ford Focus, Vauxhall Astra, or Volkswagen Golf range from £30 to £90. Premium brands like Brembo or EBC cost more - £100-£150 - but last longer and perform better in wet weather. Budget pads under £25? Avoid them. They wear fast, fade under heat, and can be dangerously noisy.
Labour at a garage? Around £80-£120 per axle. So if you’re doing both front pads yourself, you’re saving £160-£240. That’s more than the cost of the pads and tools combined.
When to Call a Pro
Changing brake pads is fine for most people. But if any of these sound familiar, stop and call a mechanic:
- Your car has ABS or electronic brake-force distribution - and the warning light came on during or after replacement.
- The caliper is seized, rusted, or leaking fluid.
- You’re replacing rear pads on a car with an electronic parking brake - these often need special diagnostic tools to retract the caliper.
- You’re not confident. Brakes are not a place to guess.
Some modern cars - like newer BMWs, Audis, or Teslas - require a diagnostic scan to reset the brake wear sensor after replacement. If your dashboard shows a brake warning light after you finish, you didn’t complete the job. You need a scanner. Most independent garages have them. You can buy one for £50, but it’s overkill unless you’re doing this regularly.
How Often Should You Change Them?
There’s no fixed number. Brake pads last between 25,000 and 70,000 miles. It depends on:
- How hard you brake (city driving? Lots of stop-and-go? That wears them fast.)
- What kind of pads you use (ceramic lasts longer than organic).
- Weather (wet, salty roads in winter? More corrosion, more wear.)
Check them every 10,000 miles. You can peek through the wheel spokes. If the pad is less than 3mm thick, replace it. If you can see metal, you’ve already damaged the rotor. That’s expensive.
Final Reality Check
Is changing brake pads easy? Yes - if you’re methodical. No - if you rush. It takes 1.5 to 3 hours the first time. You’ll make mistakes. You’ll curse. You’ll probably spill brake fluid on your garage floor. But you’ll also learn something valuable.
Most people who do it once never go back to paying £150 for the job. It’s not about saving money - it’s about knowing your car. And in the UK, where winters are brutal and roads are wet, knowing your brakes work is worth more than any tool.
Can I change brake pads without lifting the car?
No. You need to remove the wheel to access the caliper and pads. Lifting the car with a jack and securing it on stands is the only safe way. Never attempt this with the car on the ground - you won’t have enough room, and you risk injury.
Do I need to replace rotors when I change brake pads?
Not always. If the rotors are smooth, not grooved, and thicker than the manufacturer’s minimum thickness (usually 2mm), you can reuse them. But if you hear grinding or feel vibration when braking, the rotors are worn. Replacing pads on damaged rotors leads to noise, uneven wear, and reduced stopping power.
Can I use any brake pads for my car?
No. Brake pads are vehicle-specific. Using the wrong ones can cause poor braking, noise, or even damage to the caliper or rotor. Always check your make, model, year, and engine size. Reputable brands like Textar, Brembo, or Mintex list compatibility on their packaging.
Why do my brakes squeal after replacing the pads?
Squealing usually means the pads aren’t seating properly or there’s dust or rust on the caliper bracket. Clean the contact surfaces with brake cleaner. Apply anti-squeal paste on the back of the pads. Also, make sure the shims (if included) are installed. New pads can take a few hundred miles to fully bed in.
Is it safe to drive with worn brake pads?
No. Worn pads reduce stopping distance dramatically, especially in wet conditions. If you hear metal-on-metal grinding, you’re damaging the rotors and risking brake failure. In the UK, driving with brake pads below 1.5mm thickness is illegal and will cause an MOT failure.